
-
질문 & 답변
카테고리
-
세부 분야
모바일 앱 개발
-
해결 여부
미해결
강의를 듣고 응용해봤는데 질문있습니다
22.05.07 14:41 작성 조회수 173
0
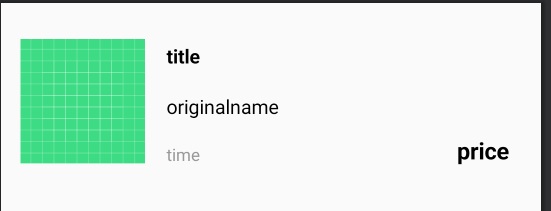
강의의 게시판 만들기 부분을 실습하고 나서 게시글 양식으로 만드셨던 board_list_item.xml을 이렇게 변경해봤습니다. 나머지 글들은 강의에서 하던대로 따라해서 불러와지는게 되는데 제가 추가한 저 초록색사진은 글을 작성할때 즉 강의 상의 코드인 BoardWriteActivity.kt에서 사진이 첨부되면 그 첨부된 사진이 저 초록색사진에 같이 업로드 되게끔 만들고 싶습니다. 저 사진의 id값은 preview입니다.
<?xml version="1.0" encoding="utf-8"?>
<ScrollView xmlns:android="http://schemas.android.com/apk/res/android"
    xmlns:app="http://schemas.android.com/apk/res-auto"
    xmlns:tools="http://schemas.android.com/tools"
    android:layout_width="match_parent"
    android:layout_height="match_parent"
    android:orientation="vertical"
    tools:context=".Sell">

    <FrameLayout
        android:layout_width="match_parent"
        android:layout_height="match_parent">

        <androidx.appcompat.widget.Toolbar
            android:id="@+id/toolbar2"
            android:layout_width="match_parent"
            android:layout_height="wrap_content"
            android:background="?attr/colorPrimary"
            android:minHeight="?attr/actionBarSize"
            android:theme="?attr/actionBarTheme"
            app:titleTextColor="@color/white"
            app:layout_constraintEnd_toEndOf="parent"
            app:layout_constraintStart_toStartOf="parent"
            app:layout_constraintTop_toTopOf="parent">

            <TextView
                android:layout_width="wrap_content"
                android:layout_height="wrap_content"
                android:text="판매글 작성"
                android:textSize="23sp"
                android:textStyle="bold"/>
        </androidx.appcompat.widget.Toolbar>

        <LinearLayout
            android:layout_width="match_parent"
            android:layout_height="match_parent"
            android:gravity="center"
            android:orientation="vertical">

            <EditText
                android:id="@+id/et_newtitle"
                android:layout_width="330dp"
                android:layout_height="50dp"
                android:layout_marginLeft="20dp"
                android:layout_marginTop="70dp"
                android:gravity="center"
                android:maxLength="15" />

            <EditText
                android:id="@+id/et_originalname"
                android:layout_width="330dp"
                android:layout_height="50dp"
                android:layout_marginLeft="20dp"
                android:layout_marginTop="20dp"
                android:gravity="center"
                android:hint="※주의 : 책 제목 그대로 써주세요 ※"
                android:maxLength="100" />

            <EditText
                android:id="@+id/et_price"
                android:layout_width="330dp"
                android:layout_height="50dp"
                android:hint="숫자 옆에 원을 붙여주세요"
                android:layout_marginLeft="20dp"
                android:layout_marginTop="20dp"
                android:gravity="center"
                android:maxLength="10" />

            <ImageView
                android:id="@+id/imageupload"
                android:layout_width="wrap_content"
                android:layout_height="wrap_content"
                android:src="@drawable/baseline_add_black_48dp"
                android:layout_marginTop="30dp"
                />

            <EditText
                android:id="@+id/et_newdetail"
                android:layout_width="334dp"
                android:layout_height="260dp"
                android:layout_marginLeft="20dp"
                android:layout_marginTop="30dp"
                android:layout_marginBottom="10dp"
                android:background="@drawable/boxline"
                android:ems="10"
                android:gravity="top"
                android:hint="내용을 입력하세요."
                android:maxHeight="200dp"
                android:maxLength="200" />

            <LinearLayout
                android:layout_width="wrap_content"
                android:layout_height="96dp"
                android:layout_marginBottom="60dp"
                android:gravity="center"
                android:orientation="horizontal"
                android:paddingTop="30dp">

                <Button
                    android:id="@+id/upload"
                    android:layout_width="wrap_content"
                    android:layout_height="wrap_content"
                    android:layout_marginRight="50dp"
                    android:text="올리기" />

                <Button
                    android:id="@+id/cancel"
                    android:layout_width="wrap_content"
                    android:layout_height="wrap_content"
                    android:text="취소" />

            </LinearLayout>

        </LinearLayout>

        <FrameLayout
            android:layout_width="match_parent"
            android:layout_height="match_parent">

            <TextView
                android:id="@+id/newtitle"
                android:layout_width="35dp"
                android:layout_height="wrap_content"
                android:layout_marginLeft="15dp"
                android:layout_marginTop="90dp"
                android:text="제목"
                android:textSize="16sp" />

            <TextView
                android:id="@+id/newname"
                android:layout_width="wrap_content"
                android:layout_height="wrap_content"
                android:layout_marginLeft="12dp"
                android:layout_marginTop="160dp"
                android:text="상품명"
                android:textSize="15sp" />

            <TextView
                android:id="@+id/price"
                android:layout_width="wrap_content"
                android:layout_height="wrap_content"
                android:layout_marginLeft="10dp"
                android:layout_marginTop="235dp"
                android:text="판매가격"
                android:textSize="13sp" />

            <TextView
                android:id="@+id/newpicture"
                android:layout_width="35dp"
                android:layout_height="17dp"
                android:layout_marginLeft="15dp"
                android:layout_marginTop="300dp"
                android:text="사진"
                android:textSize="16sp" />

            <TextView
                android:id="@+id/newdetail"
                android:layout_width="35dp"
                android:layout_height="28dp"
                android:layout_marginLeft="15dp"
                android:layout_marginTop="370dp"
                android:text="내용"
                android:textSize="16sp" />

        </FrameLayout>

    </FrameLayout>


</ScrollView>
package com.example.joonggo2

import android.content.Intent
import android.graphics.Bitmap
import android.graphics.drawable.BitmapDrawable
import android.net.Uri
import android.os.Bundle
import android.provider.MediaStore
import android.util.Log
import android.widget.Button
import android.widget.Toast
import androidx.appcompat.app.AppCompatActivity
import com.bumptech.glide.Glide
import com.example.joonggo2.databinding.ActivityBoardInsideBinding
import com.example.joonggo2.databinding.ActivityMainBinding
import com.example.joonggo2.databinding.ActivityMifBinding
import com.example.joonggo2.databinding.ActivitySellBinding
import com.google.firebase.ktx.Firebase
import com.google.firebase.storage.ktx.storage
import java.io.ByteArrayOutputStream


class Sell : AppCompatActivity() {
    private lateinit var binding: ActivitySellBinding
    private val TAG = Sell::class.java.simpleName
    val storage = Firebase.storage
    private var isImageUpload = false


    override fun onCreate(savedInstanceState: Bundle?) {
        super.onCreate(savedInstanceState)

        binding = ActivitySellBinding.inflate(layoutInflater)
        setContentView(binding.root)

        binding.upload.setOnClickListener{
            val title = binding.etNewtitle.text.toString()
            val originalname = binding.etOriginalname.text.toString()
            val price = binding.etPrice.text.toString()
            val content = binding.etNewdetail.text.toString()
            val uid = FBAuth.getUid()
            val time = FBAuth.getTime()

            Log.d(TAG, title)
            Log.d(TAG, content)

            val key = FBRef.writein.push().key.toString()

            FBRef.writein
                .child(key)
                .setValue(BoardModel(title, originalname, price, content, uid, time))

            Toast.makeText(this,"게시물이 업로드 되었습니다.", Toast.LENGTH_LONG).show()

            if(isImageUpload == true) {
                imageUpload(key)
            }


            val intent = Intent(this, AfterLoginmain::class.java)
            intent.addFlags(Intent.FLAG_ACTIVITY_CLEAR_TOP)
            startActivity(intent)

        }

        binding.cancel.setOnClickListener {
        val intent = Intent(this, AfterLoginmain::class.java)
            intent.addFlags(Intent.FLAG_ACTIVITY_CLEAR_TOP)
            startActivity(intent)


        }

        binding.imageupload.setOnClickListener {
            val gallery = Intent(Intent.ACTION_PICK, MediaStore.Images.Media.INTERNAL_CONTENT_URI)
            startActivityForResult(gallery, 100)
            isImageUpload = true
        }

    }

    private fun imageUpload(key : String) {
// Get the data from an ImageView as bytes
        val storageRef = storage.reference
        val mountainsRef = storageRef.child(key + ".png")
        val imageView = binding.imageupload
        imageView.isDrawingCacheEnabled = true
        imageView.buildDrawingCache()
        val bitmap = (imageView.drawable as BitmapDrawable).bitmap
        val baos = ByteArrayOutputStream()
        bitmap.compress(Bitmap.CompressFormat.JPEG, 100, baos)
        val data = baos.toByteArray()

        var uploadTask = mountainsRef.putBytes(data)
        uploadTask.addOnFailureListener {
            // Handle unsuccessful uploads
        }.addOnSuccessListener { taskSnapshot ->
            // taskSnapshot.metadata contains file metadata such as size, content-type, etc.
            // ...
        }
    }

    override fun onActivityResult(requestCode: Int, resultCode: Int, data: Intent?) {
        super.onActivityResult(requestCode, resultCode, data)
        if(resultCode == RESULT_OK && requestCode == 100) {
            binding.imageupload.setImageURI(data?.data)
        }
    }
}
위 사진두개는 강의에서 하신 BoardWriteActivity.kt와 역할이 같은 xml과 kt파일입니다. 지금 이 코드에서 글과 갤러리에서 사진을 첨부하는 기능은 모두 구현되어있습니다. 그런데 사진도 메인화면에 뜨게끔 하려니 너무 막막해서 질문드립니다...

답변을 작성해보세요.
0

ParkPark
질문자2022.05.13
네 아마도 말씀하신게 제가 원하는게 맞는것 같습니다. 그런데 제가 이걸 배운지 얼마 안되서 강의없이 말씀하시는것으로만 이해하려니까 정말 너무 어렵네요...

개복치개발자
지식공유자2022.05.16
꼭 말씀해주신 부분이 아니라, 안드로이드 개발에 필요한 다양한 테크닉을 다루는 강의인데요
JETPACK과 관련해서 다양한 이론과 예제가 있는 강의입니다.
아마 늦어도 5월 26일까지는 업로드 될 것 같습니다
관심가져주셔서 감사합니다~
0
ParkPark
질문자2022.05.10
현재 저는 강의의 게시판 만들기 파트의 12개영상이 모두 강의코드 그대로 구현했습니다.
다만 거기다가 덧붙여서 다른 여러가지 기능들을 넣은것일 뿐입니다.
그래서 강의코드를 기준으로 말씀드려도 제가 알아들을수 있습니다.
board_list_item.xml는 게시판 만들기 - 게시글 ListView만들기 영상에서 만드신 ListView입니다.
강의 상의 boardWriteActivity(글을 작성할수 있는 기능)로 가서 글을 작성하게 되면 board_list_item.xml의 양식으로 글이 게제가 됩니다.

1. 어떤 기능을 구현하고 있는지
- 거기에 저는 board_list_item.xml에 이미지뷰를 하나 추가했는데 그 이미지뷰에 boardWriteActivity에서 갤러리에서 사진을 불러와서 글을 게시를 할때 그 사진이 board_list_item.xml에 있는 이미지뷰, 즉, 위의 사진에 있는 초록색 사각형에도 사진을 띄어지게 하고 싶습니다.
2. 어떻게 시도해보셨는지
- 갤러리에서 불러온 사진을 어떻게 board_list_item.xml에 연결해서 넣을지 구글링해도 해답이 보이지않아 질문드리게되었습니다.
읽는 분을 고려 못하고 올려 죄송합니다. 계속 찾아보고 있지만 해결책이 보이지 않아 급하게 질문드리다보니 두서가 없었던것 같습니다.
개복치개발자
지식공유자2022.05.12
안녕하세요
이제 질문을 이해했습니다.
ListView에 있는 항목을 클릭했을 때 나오는 이미지를 ListView로 보이게 하고 싶다는 말씀이시죠?
그렇다면, 구조를 조금 변경해야 하는데요
현재는 BoardInsideActivity로 들어가서 docId를 기반으로 firebase storage에서 이미지를 받아오게 구현했습니다.
원하시는대로 구현하시려면, BoardList가 보이는 Activity에서 Firebase Realtimedatabase에 데이터를 다 가져온다음
docId를 기반으로 이미지를 가져와서 보여주는 작업을 Adapter에서 해주셔야 합니다.
이 작업이 생각보다 번거롭기 때문에, 실 서비스에서 구현한다면 전체 boardList데이터에 imageUrl도 함께 주는 형태로 구현하면 될 것 같습니다.
혹시 제가 이해를 잘 못 했거나, 설명이 어려우시면 한번 더 말씀해주세요.
0
개복치개발자
지식공유자2022.05.09
안녕하세요?
우선은 강의 내용이 아닌 개인프로젝트라고 하시면 말씀해주신 사항으로만 제가 맥락을 파악하는데 조금 어렵습니다.
1. 어떤 기능을 구현하고 있는지
2. 어떻게 시도해보셨는지
3. 시도해보니 어떤 오류가 있는지
4. 오류 메세지는 어떻게 나오는지
에 대한 정보를 자세히 알려주시면 도움드릴 수 있을 것 같습니다.

답변 3