inflearn logo

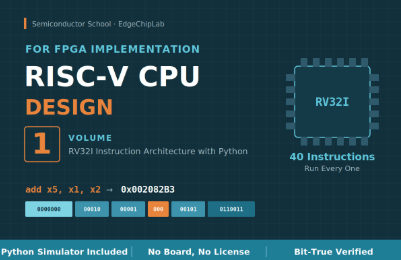
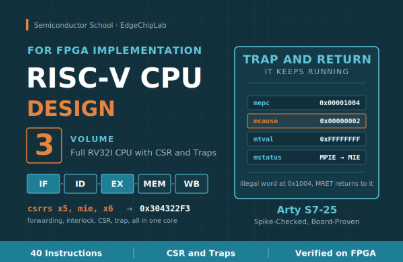
RISC-V CPU Design for FPGA Implementation ① Learning the RV32I Instruction Structure and Execution Principles with Python

When you decide to build a CPU, you usually start by looking for a circuit diagram. But the moment you unfold the schematic, questions arise that you cannot answer. Why does this block need to be here? Why are there two ports for reading registers? The answer lies entirely in the instructions. Once you know what the instructions require, the circuits you need are determined. It does not work the other way around. There are already many RISC-V courses. But most of them display values on slides, say "This is how it works," and move on. Students have no way to verify whether those values are correct. This course comes with a Python instruction-execution simulator. Type run ADD, and the machine code is assembled on the spot, the 32 bits are broken down by field, and how the registers change appears on the screen. Every number in the textbook is the result of running this tool, and it can be reproduced identically on your screen. Commercial debuggers require licenses, and simulators are difficult to install. This tool only requires Python. No board, license, or installation is needed. You will execute all 40 RV32I instructions yourself without leaving out a single one, discovering along the way what the circuit needs to do.

8 learners are taking this course

Level Basic

Course period Unlimited

riscv
riscv
cpu-architecture
cpu-architecture
instruction-set-architecture
FPGA
FPGA
Computer Architecture
riscv
riscv
cpu-architecture
cpu-architecture
instruction-set-architecture
FPGA
FPGA
Computer Architecture

What you will gain after the course

  • · You will establish the criteria for designing an instruction set for your own CPU.

  • · You can develop a specific CPU design topic for a capstone design project, competition submission, or graduation project.

  • · You can look at 32-bit machine code, determine its format, split it into fields, and read what instruction it represents.

  • · You can directly execute 40 RV32I instructions and observe changes in the registers and memory.

  • · Can explain which blocks of the circuit an instruction passes through and how the 13 control signals are determined

  • · You will have a Python command execution simulator that you can run again at any time

  • · You can understand the meaning of Bit-True verification and determine what the statement “verified” guarantees.

  • · In technical interviews, you can answer questions about how the CPU works based on hands-on experience rather than memorized explanations.

Build a CPU yourself on an FPGA.

The CPU is the brain of the computer. However, there are not many courses that systematically teach you how to design a CPU yourself. Most begin by showing RTL code or explaining the datapath. But the real question is this.

Why does the CPU need to have this structure?

Why are there 32 registers?

Why do we need an ALU?

Why are there two read ports?

Why does Write Back exist?

The answers to all these questions are found in the instructions. A CPU is a circuit built to execute instructions. If you do not understand instructions, you cannot understand a CPU either. This lecture is a process of learning instructions from the perspective of someone who designs CPUs.


The Goal of This Course

The goal of this course is not to memorize the RV32I instructions. It is to build the foundation for designing a RISC-V CPU that operates on an FPGA. Going forward, you will…

· Single-Cycle CPU

· Pipeline CPU

· You will proceed through FPGA implementation.

This course is the first step.


■ Why this order?

Many people start by studying RTL in order to build a CPU. However, the order should be reversed.

Instruction → required operation → datapath → control signals → RTL → FPGA

A CPU is the result of implementing the functionality required by instructions. Let’s take ADD as an example.

Two registers must be read, the ALU must perform the calculation, and the result must be written back to a register. These requirements determine the register file, ALU, MUX, and control unit.

This is also why there are two read ports. None of the 40 RV32I instructions reads more than two registers. Once you understand the instructions, you can see why that circuit is necessary.


■ What will you learn?

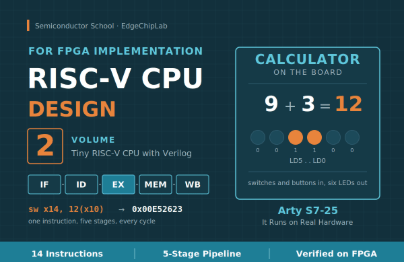
You will execute all 40 RV32I instructions yourself. This is not simply about showing add x5, x1, x2 → 0x002082B3. You will create machine code yourself, decode it again, execute it, observe the registers change, confirm the memory changes, and even trace the datapath and control signals.

See exactly how a single instruction moves through the CPU from start to finish.


■ What makes this course unique

This course includes RV32I Instruction Studio, a Python-based instruction simulator created by the instructor. No separate FPGA board is required. You do not need a complex simulator either.

If you have only Python installed

· Instruction execution

· Generate machine code

· Decoding

· Check the registers

· Check memory

· Check the datapath

· control signal checks can all be performed directly by you.· tín hiệu điều khiển.


You can reproduce all the numbers in the textbook and obtain the same results.

· Execute all 40 instructions — these are not examples selected from only the frequently used ones

· Learning begins only after all 1,231 built-in validations pass

· We deliberately introduce 14 defects and even test whether the verification actually catches them

· No external libraries — just 550KB in total, and you can get started with a single line after extracting it.


■ Curriculum

Section 1. Understanding the Basics of the CPU

1. How Does a CPU Execute Instructions? — Hands-On Environment and Registers

2. 32-bit Instruction Structure and Immediate Values

Section 2. Executing RV32I Instructions

3. Arithmetic, Logical, and Shift Instructions

4. Load/Store · Branch · JAL/JALR Instructions

Section 3. How Does the CPU Work?

5. Single-Cycle Datapath and Control Signals

Section 4. CPU Verification and Wrap-Up

6. Bit-True Verification and Roadmap for the Next Steps

Each lesson is followed by a lab. The execution order, screen checks, self-assessment items, and example solutions'

It consists of four steps, showing exactly what to enter and in what order.


■ Recommended for

· Those who want to implement a CPU directly on an FPGA

· Those who are just starting out with CPU design

· Those who want to learn RISC-V systematically

· Those who want to connect computer architecture with RTL design

· Those who want to implement a CPU for a capstone design project or competition

· Those preparing for employment in the system semiconductor and fabless industries


■ Practice Environment

All you need is Python and Jupyter Notebook.

https://github.com/estlit/SemiconductorSchool-Labs

→ Level4_Lab_RV32I_Instruction_Studio.zip

Extract the files, and you can get started in Jupyter with the single line below.

%run Lab01.py


■ By the end of the course

You will

· Understand RV32I instructions and

· Be able to explain the CPU datapath,

· Understand why control signals are necessary

· gain the foundation needed to implement a CPU on an FPGA

In the next course, you will implement the instructions you learned this time in Verilog RTL and run them on an FPGA board.

Volume 1 RV32I Instruction Structure and Execution ← You are here

Volume 2 TinyRV32I · 5-Stage Pipeline and FPGA Implementation

Volume 3 Standard CPU · 40 Instructions and Hazard Control

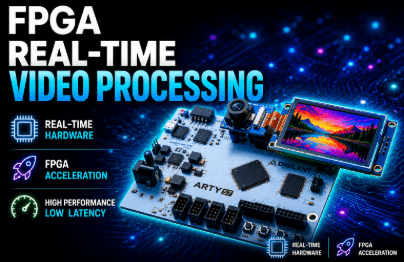
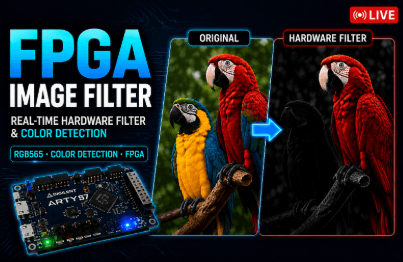
Volume 4 Vision · NPU SoC · Camera and Accelerator Integration


This is the first step in the long journey of building a CPU.

Start now.

Recommended for
these people

Who is this course right for?

  • · Those who want to design their own CPU directly in hardware

  • · System software and firmware developers looking to learn the RISC-V architecture through hands-on practice

  • · Those who want to understand instruction set architecture (ISA) through execution rather than specification documents

  • · University and graduate students preparing to design FPGA-based processors

  • · Those preparing for employment in the system semiconductor and fabless fields who need expertise in CPU architecture

  • · Those who need to interpret assembly code and register states in practical embedded development work

  • · Those who want to verify CPU operation in a hands-on environment without a commercial debugger license

Need to know before starting?

  • Python basics (it’s sufficient to be able to run code and read the results)

  • Computer Architecture Basics (You can follow along without it)

Hello
This is EdgeChipLab

Career Verified

Design and implement AI semiconductors directly on FPGAs

As a current university professor, I have incorporated 30 years of experience in the system semiconductor industry, along with expertise in AI semiconductor research and education.

This is a hands-on curriculum designed by a professor who teaches semiconductor engineering, based on direct design and FPGA verification experience—from starting as a systems semiconductor researcher in Samsung Electronics’ DS Division, to serving as a Director at the company’s UK and German subsidiaries, and then leading the System LSI marketing and sales group.

This is not simply a course on how to use FPGAs.
It is designed to help you understand AI algorithms → directly design NPUs and CPUs in RTL → implement them on an FPGA → verify them on actual hardware → and ultimately expand to AI SoCs.

AI Algorithm → RTL Design → FPGA Implementation → Bit-True Verification → AI SoC


Beyond theory to real-world AI hardware implementation

It is difficult to develop system-level AI semiconductor design capabilities with only fragmented, scattered knowledge.

Students do not stop at using finished black-box IP. The goal is to gradually develop the system design skills needed to design an AI NPU and RISC-V CPU themselves, integrate memory and peripherals, and ultimately build their own AI SoC.

Starting with the fundamentals of transistors and digital circuits, you will progress through FPGAs, CPUs, and NPUs to hardware for accelerating Transformers and LLMs.


We validate the research results on actual FPGA hardware.

This is not a lecture you simply watch. Rather than stopping at theory or basic simulations, you will run AI semiconductor circuits you designed yourself on an actual FPGA and perform Bit-True verification to confirm that the Python model and RTL results match down to the last bit.

The instructor’s research findings, including four KCI-listed papers on AI semiconductors, FPGAs, and RISC-V, are also connected to the educational content, enabling technologies validated through research to be applied to actual designs and FPGA implementations.

We make the source code needed for hands-on practice publicly available, including our self-developed RISC-V CPU, Python code for image training, and Verilog RTL.

Centered around the affordable Arty S7-25 FPGA board and the free Vivado design tool, this course is designed to enable learners to reproduce the entire process of designing, implementing, and verifying their own work.

It is also compatible with Digilent FPGA boards, including the Zybo Z7. You can use it by modifying the XDC pin mapping (board) and clock division parameters (RTL) to match the board.

The 'MNIST NPU with FPGA' course only requires modifying the XDC pin mapping, while courses using an OLED and Camera require modifying the clock division parameters (RTL).

→The lecture exercises are configured with clock division parameters based on Arty S7’s 100 MHz input clock. Since other boards have different input clocks (for example, Zybo Z7 has 125 MHz), you will need to recalculate the division values so that the target frequency remains the same. If you miss this part, the screen or video may not display properly, which can easily be mistaken for a code error, so please check it.


A Seamless Full-Stack Roadmap: From the Basics to a mini LLM Accelerator

All the lectures are not independent fragments, but a journey toward completing one vast system.

  • Step 1: AI Theory and Image Processing Fundamentals (including Machine Learning)

  • Step 2: AI Accelerator (NPU) Design and Verification (Including Machine Learning)

  • Step 3: RISC-V CPU Design and System Integration

  • Step 4: Advanced AI SoC Implementation and Expansion into a mini LLM Acceleration Platform (Continuous Content Updates)


Objective verification metrics

All design outcomes from this course have undergone rigorous validation against global standards and by academia.

  • RISC-V Architecture Verification: In-house developed RISC-V CPU, passed the international foundation’s official compliance test (ACT), with source code released publicly (GitHub)

  • Academic Authority: Four sole-authored academic papers (published in the prestigious KCI A-rated journal IJIBC)

  • Global Recognition: Authored and published two global Amazon technology books (reached No. 3 on the bestseller list)

  • Real-world operation verified: Core IPs including the RV32I CPU, NPU, vision system, GPS, Transformer, and AURA-Edge SoC operate flawlessly in the Arty S7 environment.

Take on the challenge. By the time you complete this process of uploading code directly to the board and verifying the results, you will have leveled up into a hardware engineer with a completely different perspective.

More

Curriculum

All

6 lectures ∙ (1hr 41min)

Published: 
Last updated: 

Reviews

Not enough reviews.
Please write a valuable review that helps everyone!

EdgeChipLab's other courses

Check out other courses by the instructor!

Similar courses

Explore other courses in the same field!

Limited time deal ends in 2 days

$29,040.00

20%

$28.60