Blender UV Mapping Bootcamp: Unwrapping & Texturing
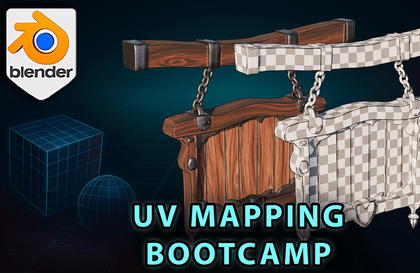
UV Mapping Bootcamp: Master Unwrapping & Texturing in Blender Bad UVs wreck great artwork—master clean, distortion-free unwrapping today! I am Luke from 3D Tudor, and UV Mapping Bootcamp distills fifteen years of texturing pain points into one focused Blender workshop. We will turn stretched checkerboards into crisp atlases, tame texel density, and build trimsheet-ready layouts that export cleanly to Substance, Unreal, and Unity. Stretched textures, popping seams, and checkerboards that slide around like budget origami can make even a gorgeous model look amateur in seconds. I have fought those same misbehaving UVs myself, so let us sort them out together and give your textures the respect they deserve! What You Will Learn The real purpose of UVs and how Blender’s editor organises them Smart UV Project versus seam-driven unwrapping—choose the right tool for the job Cube, cylinder, and sphere projections (and how to combine them) Troubleshooting: flipped normals, hidden overlaps, mip-map bleed, poor packing Consistent texel density across modular scenes, props, and characters Trimsheet workflows for bolts, vents, and sci-fi panels Texture-atlas strategy: pack more detail into fewer materials Human and creature unwrapping—ears, mouth bags, fingers, and toes without stretch Vertex-paint blending, AO masks, and curvature maps that respect your UVs Inside the Course Stage 1 – UV Concepts & BasicsWe start at the beginning—what UVs are, how they work, and why they matter. You will see how 3D surfaces are flattened into 2D space and how Blender’s UV Editor helps you control distortion. We also break down UV axes, the role of checker maps, and the difference between good and bad UVs. Visual tools and real-time examples set the foundation before moving into more hands-on workflows. Stage 2 – Auto UnwrappingHere, we speed through Blender’s Smart UV Project tool. You will learn how it slices geometry based on angles, when to use it for hard-surface models, and where it falls short (like painting or packing). We explore how the tool auto-rotates UV islands and the trade-offs of speed vs. precision. Stage 3 – Projection MethodsLearn how cube, cylinder, and sphere projections behave when applied to different meshes. We test them on primitive and subdivided models, using checker maps to identify which method works best for each shape—and when to mix them. Stage 4 – UV TroubleshootingThis stage focuses on clean geometry and solid workflows. You will learn to apply transforms, fix flipped normals, avoid mipmap bleed, and handle overlapping UVs. We also introduce Blender and Substance tools for visualising distortion, and explore padding’s role in texture clarity across engines. Stage 5 – Volume vs. Surface DensityUnderstand how surface area affects texel density. Through examples like brick walls and terrain planes, you will learn to optimise padding, scale, and UV island layout to get the most resolution without visual compromise. Stage 6 – Organic UnwrappingUnwrapping irregular shapes—like mushrooms and rocks—requires a different mindset. You will mark seams for curved objects, balance seam visibility with material flow, and test UV quality using procedural materials. Perfect for stylised or organic assets. Stage 7 – Custom Shape StrategyWhen textures need directional alignment (like roof tiles), you will learn how to unwrap cones, pyramids, and house shapes to preserve visual consistency. We also cover stylised rock unwrapping, showing how to prioritise density and flow depending on the asset’s purpose. Stage 8 – Directional Noise & FlowThis stage tackles directional textures—like wood grain—and how UVs affect their appearance. Using a stylised sign, we compare directional vs. non-directional materials, introduce the Magic UV and UV Squares add-ons, and show how to control texture flow for better realism. Stage 9 – Beveled Mesh WorkflowBevel modifiers are great visually, but difficult for UVs. We unwrap a stylised barrel before and after applying bevels, showing how early planning and proper seam placement can preserve clean UVs, even on rounded geometry. Stage 10 – 0–1 UV Space & AtlasesHere, we jump into real-time workflows. You will unwrap props like shelves, books, and plants using a single UV space. Learn how to scale islands based on asset importance, align layout to a master atlas, and balance quality with modularity. Stage 11 – Human UnwrappingAnatomical forms need care. You will learn how to unwrap hands, feet, ears, and facial features like the nose and mouth bag. We cover pinning, stretching, and isolating geometry to maintain clean seams and efficient island management for humanoid characters. Stage 12 – Vertex Painting PrepLow-res terrain or large landscape meshes need special treatment. You will unwrap them efficiently and create shaders that let you paint directly on the geometry—great for blending textures without blowing up texel costs. Stage 13 – Procedural Masks & DecalsYou will explore AO, curvature, and gradient masks inside Blender and Substance Painter. We also dive into decals for breaking up repetition and use shaders to blend in extra details where needed—essential for stylised props or terrain. Stage 14 – Trimsheet TechniquesWe end with trimsheets. You will learn to align UVs to trim patterns, bend and mirror them, and use them to quickly decorate stylised props like sci-fi crates. This technique is the crown jewel of UV reuse, giving you complex texture results with minimal overhead. Why This Course Stands Out Expect a zero-fluff blueprint that starts with a cube, scales up to characters, and ends with a production-ready asset. Every pitfall is demonstrated, fixed, and summarised—so the workflow survives version updates and engine changes. When the course ends, you will spend your time designing art, not hunting stretched pixels. Until next time, happy modelling everyone!Luke – 3D Tudor