Verilog FPGA Program 6 - DDR Arbiter (HIL-A35T)
alex
This lecture implements a DDR Memory Arbiter.
Basic
Verilog HDL, FPGA
Reviews from Early Learners
5.0
haneuli
I am using it like an encyclopedia. I feel once again how happy it is to have a teacher. Thank you!
5.0
miheungsound
I studied FPGA in advance before this lecture, but it was too difficult. I'm watching it once now, and I think I'll learn it happily if I follow this lecture. I think it's a good lecture. I'll definitely succeed.
5.0
wwe0898
Course completed
Verilog RTL Design
FPGA Design
Are you interested in FPGAs?
Then do Verilog! 😁

Verilog, which has a similar grammar to the C language, is a hardware description language (HDL) used for electronic circuits and systems. It is used for various purposes such as circuit design, verification, and implementation.
There are many developers who are interested in implementing FPGAs using Verilog. However, it is very difficult to find a lecture that explains this in detail. Now, meet a lecture that summarizes the contents used in development by a current professional for more than 20 years! The lecture content may seem difficult, but if you read it carefully 3-4 times and practice it, it will be a good guide for you to grow as an FPGA developer.
This lecture covers in detail the implementation of FPGA using Verilog HDL. You will learn the entire process of implementing Verilog code , verifying the results through simulation , and finally downloading the implemented content to the Arty A7 board and verifying the results . In addition, IP (clock-related, memory-related) provided by Xilinx is covered. If you understand the content explained in this lecture and learn your own coding method, you will become a skilled developer in FPGA design.
📢 Please make sure to check before taking the class!

How to use vivado tools

Verilog coding

Create a tech bench
Doing a simulation

Results on the board
Download and check
I have been developing using FPGA for about 20 years. I have also made and released ASIC. However, I still do not fully understand the world of FPGA. The world of FPGA is that wide. You need to know a lot about tools, HW, Verilog, etc. What I have felt while working so far is that in order to handle Verilog or FPGA well, you need to have your own program format (coding rules) . This lecture explains this part in detail. I hope you learn the content explained in the lecture and create your own format.
This lecture is for those who have some knowledge of Verilog grammar and understand HW contents . Since Verilog HDL is similar to C language, it will be helpful to know C language. Also, this lecture downloads the final result to the board (Arty A7, Digilent) and checks the result. Verilog HDL should not end with checking the result in Simulation. Verilog HDL must be downloaded to the FPGA board and the operation must be confirmed. Those who take this lecture are recommended to first look at the content and purchase a practice board to check the result.
If there is anything you do not understand in the lecture, please post a question through the Inflearn community or the cafe I run and I will answer it.
The structure of this lecture is as follows.
We will explain in detail how each process is carried out through the vivado 2018.3 version.
The practical content is as follows.
The first practical content is counter. Counter is a simple module, but it is actually used a lot. Design a counter, create a test bench, and simulate whether the implemented code works properly. Finally, apply it to the board and check the result by turning the LED on/off.
The second practical topic is SPI communication. The reason why SPI was chosen is because it is an interface that is relatively easy to implement among various interfaces and is actually widely used. First, implement SPI Master, and then implement SPI Slave. Then, implement communication between Master and Slave and check if it works properly on the board.
The third content explains Clock and Memory, which are widely used and easily accessible IPs provided by Xilinx.
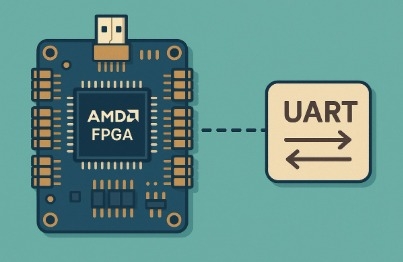
The fourth content is UART communication. We will implement a Uart Controller and verify it through communication with a PC.
The fifth practical topic is I2C communication. I2C communication looks simple, but implementing it in code is not easy at all. It is 2~3 times more difficult than SPI. If you implement I2C Master and Slave in code, you can implement other interfaces without difficulty. Before implementing the code, we will cover in detail how to set the specifications and how to design the SM (State Machine). The implemented I2C Controller will be verified to operate on the board.
The sixth content is a new addition to v2.1. It implements a Non-Return Zero Level (NRZL) Decoder. In particular, it explains in detail how to design and use FIFO. FIFO is a very important IP used in many fields. Through this chapter, you can understand how to design and implement FIFO.
The seventh content is what was added in v2.3. It implements the FMC(Flexible Memory Controller) Interface. In particular, it includes how to solve Timing Violations that commonly occur when using more than two clocks.
The eighth content is what was added in v2.4. It tests the speed (performance) of the Block Memory inside the FPGA and determines what the most appropriate speed is.
Q. Who is the target audience for this lecture?
You should have some (beginner) knowledge of Verilog grammar and basic knowledge of HW.
Q. Is there anything I need to prepare to attend the lecture?
The lecture will be conducted on a practice board (Arty A7 -35T or 100T, Digilent product). However, if you do not have a board, you can listen to the lecture first, proceed as explained in the lecture (coding and simulation), and then proceed with the practice later when the board is ready. In addition, JTAG-HS2 (or HS3) is used to download to the board.
Q. What program tools do you use?
This lecture is for Xilinx FPGA. The SW tool uses vivado 2018.3 version. The SW installation is not included. Please install the SW tool (vivado 2018.3 or later) before taking the lecture.
I have been working as a developer for over 20 years in large and small companies and currently run a small business. I have developed an ISP (Image Signal Processing) ASIC for CCTV and many products using FPGA such as OLED inspection equipment and DAQ (Data Acquisition System). In addition to FPGA, I have a lot of experience in FW development (STM32, PIC32, AVR, ATMEGA, etc.), circuit design, and Windows Program.
Who is this course right for?
If you are interested in FPGA
Anyone interested in Verilog
If you want to upgrade your Verilog skills
If you want to upgrade your FPGA
Need to know before starting?
Verilog HDL
FPGA
1,804
Learners
89
Reviews
133
Answers
4.8
Rating
18
Courses
I have worked as a developer at both large corporations and SMEs for the past 20 years,
I am currently the CEO of a small company.
Key career highlights include
FPGA design using Verilog HDL
ISP ASIC development for CCTV (approx. 10 years)
OLED Display inspection equipment development (approx. 3 years)
Equipment development using FPGA
MCU FW
STM32
PIC32
AVR, ATMEGA
DSP (TI)
Windows Application Development
Visual Studio MFC, C++
.
All
359 lectures
Course Materials:
All
16 reviews
5.0
16 reviews
Reviews 4
∙
Average Rating 5.0
Reviews 2
∙
Average Rating 5.0
5
I studied FPGA in advance before this lecture, but it was too difficult. I'm watching it once now, and I think I'll learn it happily if I follow this lecture. I think it's a good lecture. I'll definitely succeed.
FPGA is not easy. If you follow the lecture content, your skills will gradually increase. Fighting and I will support you~ Thank you~!!
Reviews 1
∙
Average Rating 5.0
5
Course completed
Thank you for your hard work~ Congratulations on completing it despite the small amount. I hope you fully understand the lecture content and become a great developer in the field~!! Thank you.
Reviews 2
∙
Average Rating 5.0
Check out other courses by the instructor!
Explore other courses in the same field!