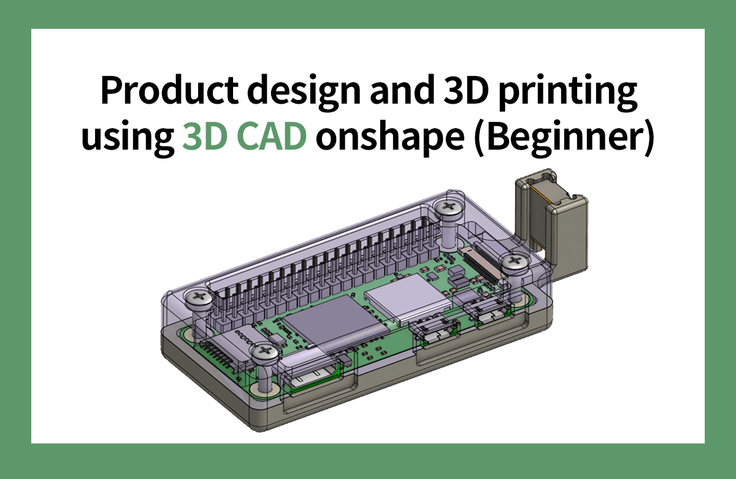
Product Design and 3D Printing Using 3D CAD onshape (Beginner)
Learn 3D CAD, model what you need, and then learn the knowledge to print it out on a 3D printer to create what you want. It can be applied to all fields that require 3D modeling based on dimensions, such as machinery, woodworking, and crafts.
Carry out the process from printing the parts to assembling them
Create 2D drawings to convey accurate component information
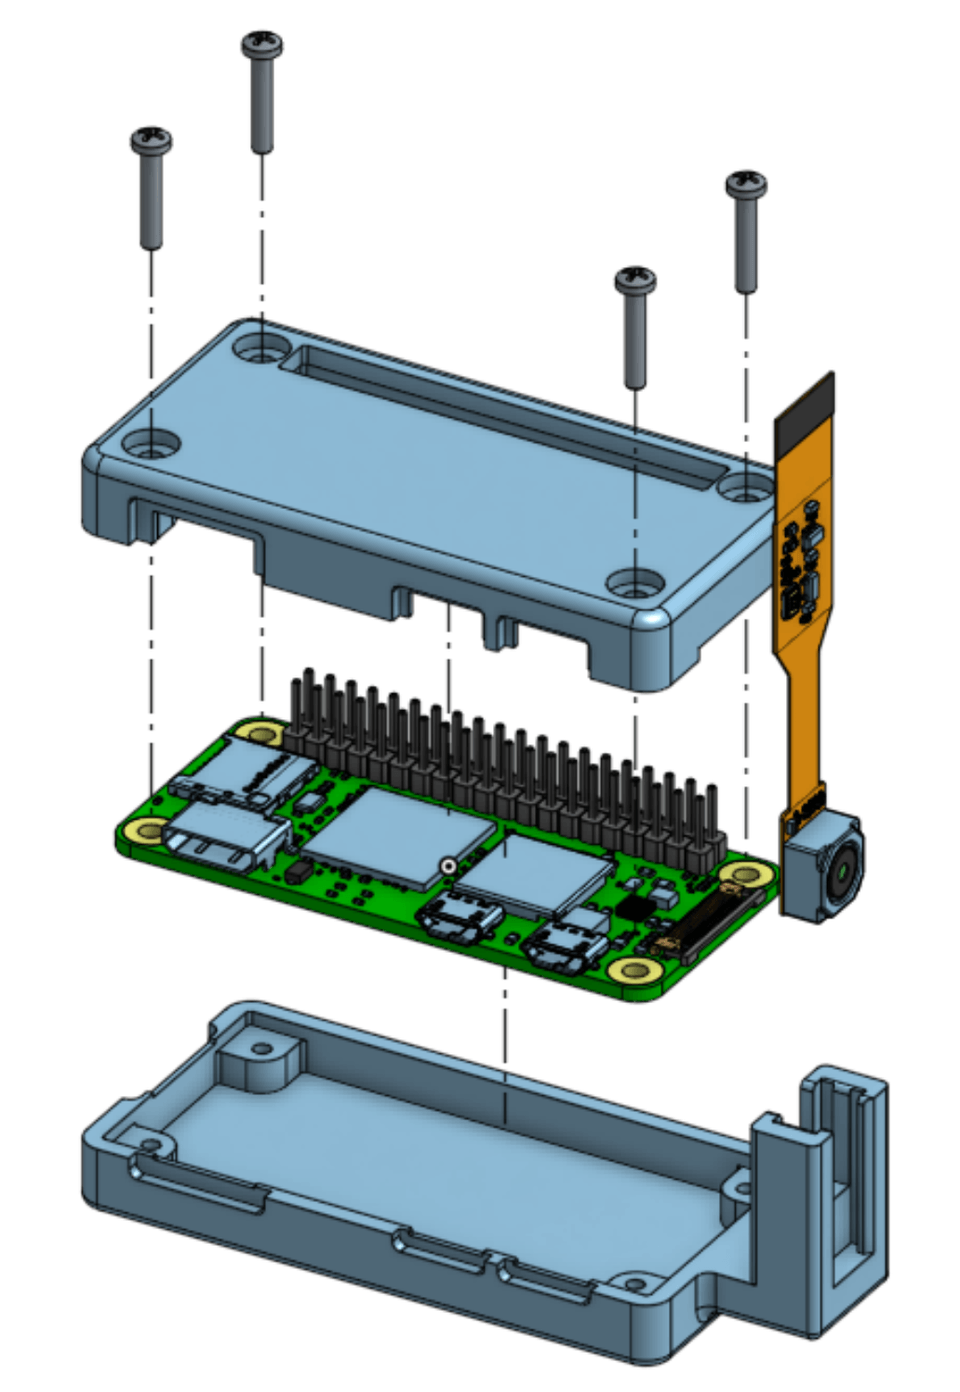
Create disassembled and assembled drawings to help you understand the product at a glance
Using CAD onshape From product design to 3D printing! 🖨️
3D modeling
Among the objects we encounter in our daily lives, Excluding items with complex curves Almost any object can be modeled .
While most CAD training focuses on learning CAD commands, this course focuses on defining a project and using the CAD system as a tool to achieve it. Of the vast number of CAD commands available, only about 10% are frequently used in modeling. This means that studying CAD solely through commands is a highly inefficient approach.
After learning the basic interface and commands, the best approach is to naturally learn more complex and support commands while completing a single project. Furthermore, the design process is also a key element. The intermediate course is designed to cover the entire process from designing, verifying, and launching a commercially viable product.
Lecture Topic 📖
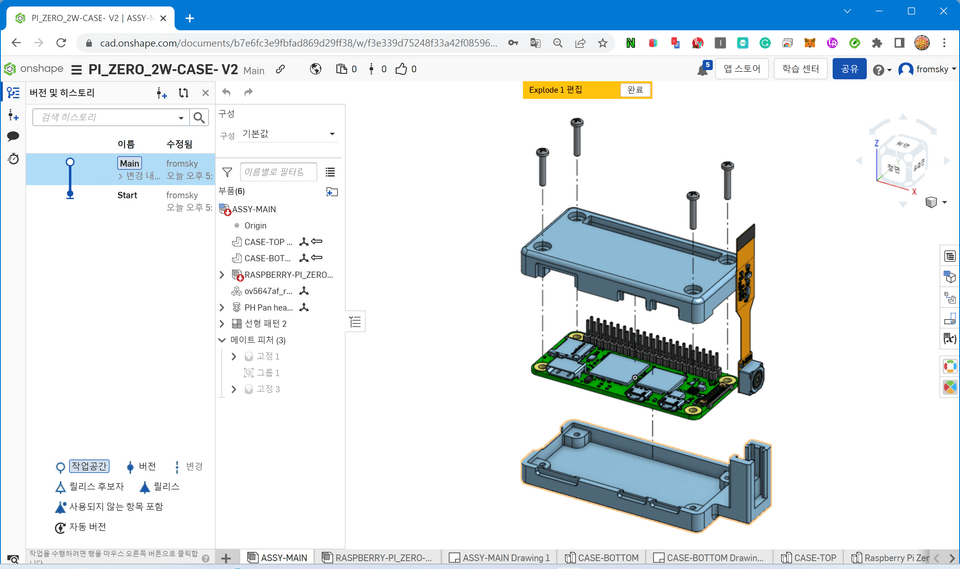
OnshapeAssembly3D PrintingRaspberry PI Zero
This course uses Onshape, a powerful cloud-based 3D CAD system, to teach beginner-level 3D modeling, assembly, and 2D drawing. Afterwards, you'll model a Raspberry PI Zero case and 3D print it to assemble it. This course focuses on practical application, not just learning CAD commands. (The free licensed version of Onshape is used in this course.)
I recommend this to these people 💁🏻♂️
Numerical based for 3D printing Anyone who wants to learn modeling programs
Woodworking and craft drawings Those who want to draw it themselves
From the basics of product development Those who want to know until the end
How to create a drawing Anyone who wants to know how to create drawings
Lecture Features ✨
This course is beginner-level and is structured around completing a single project. It goes beyond simply learning 3D CAD to enable you to utilize CAD in your daily life, hobbies, or specialized fields such as product development.
The course is designed for beginners and requires no prior theoretical background. In addition to 3D modeling, you'll also learn basic drawing skills, including how to read and create drawings. You'll also learn how to use Onshape's contextual features to understand the concept of top-down design.
3D printer printing involves printing and assembling using PLA material. The quality of 3D printer output is determined by the level of the machine, and this course focuses on an affordable model that individuals can afford.
What you'll learn 📚
The course proceeds in the following order, gradually building the knowledge necessary to carry out the project. The course consists of seven stages, each of which outlines key points and provides hands-on practice.
#1. start
We'll walk you through signing up for Onshape, explaining the user interface, and setting it up in less than a minute, but show you how to create a realistic 3D model.
#2. sketch
Learn how to draw and constrain sketches, which are the backbone of 3D modeling.
#3. Modeling commands
You'll learn the six most frequently used commands first, and the remaining commands will be learned naturally through practical training. This is a more efficient learning method, as the concepts behind the commands taught in the practical training are more complex, and learning through practice is easier.
#4. Collection of design data
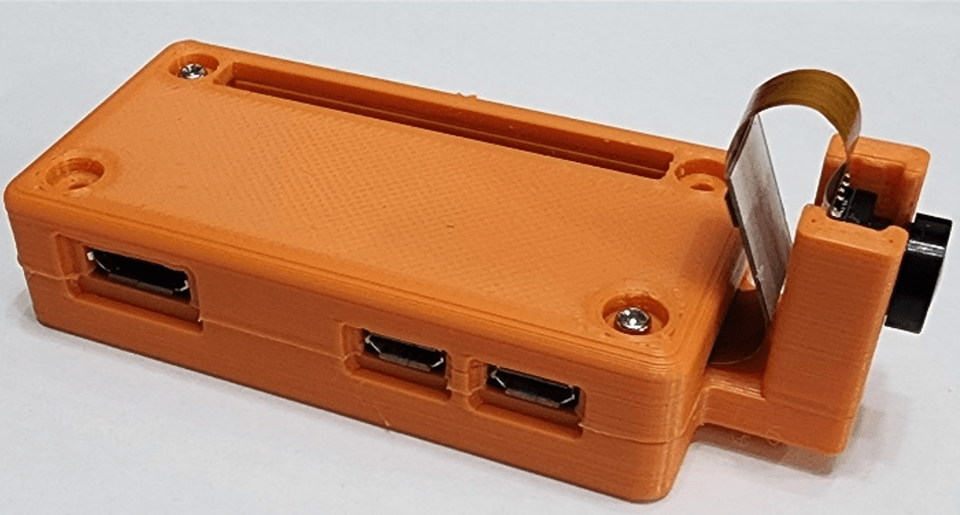
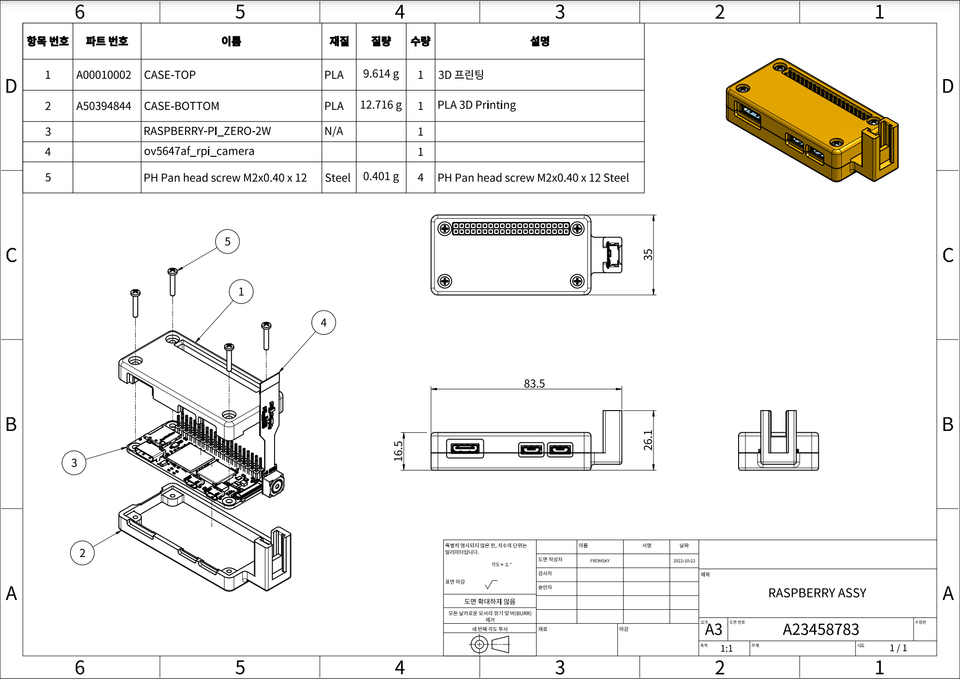
This is the stage where you define your design goals and gather data. In this lecture, we'll collect data for the Raspberry PI Zero 2W. Based on this data, we'll create an assembly and verify the collected data and model.
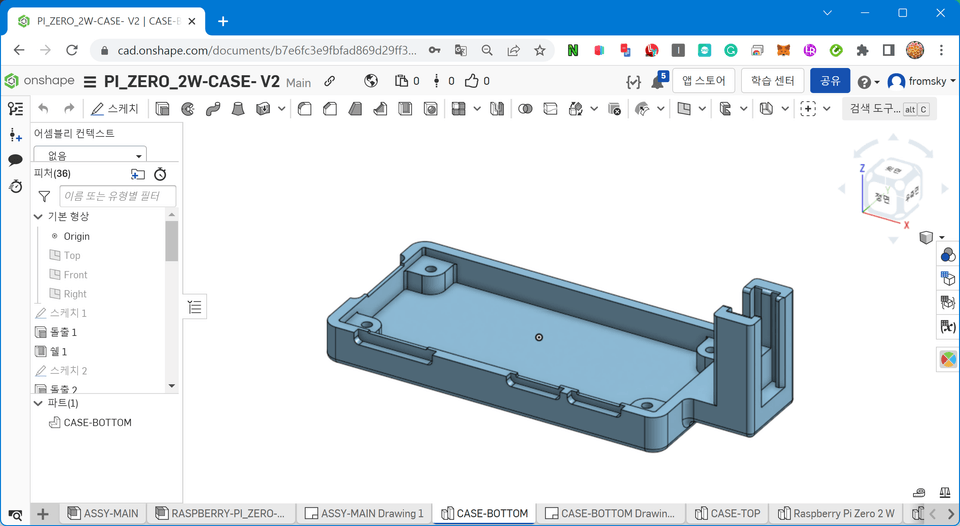
#5. Part creation and modeling
Create parts in an assembly and model them in detail.
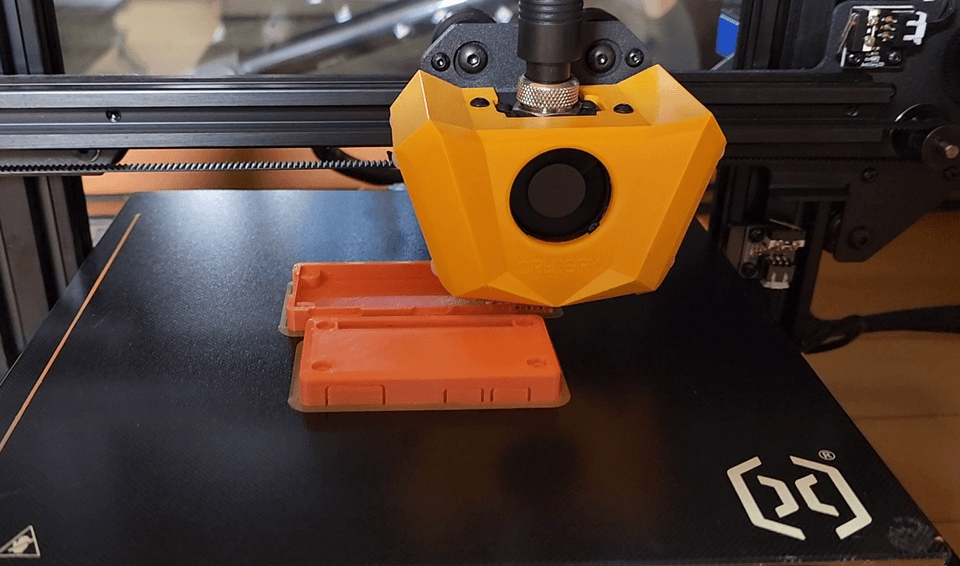
#6. 3D printing
Convert the part model to an STL file, print it with a 3D printer, assemble it, and verify it.
#7. Create 2D drawings
Create 2D part drawings, assembly drawings, and exploded views. Learn the fundamentals of drawing and how to create and dimension drawings using trigonometry.
Expected Questions Q&A 💬
Q. Can non-majors also take the course?
It's open to beginners, beginners, intermediate learners, and even non-majors. I'll avoid technical jargon whenever possible and provide detailed explanations when necessary.
Q. Do you have the necessary supplies or tools?
If possible, a 3D printer would be ideal, but if not, you can get one from a public institution. Measuring tools like vernier calipers are required, but even without them, you can still follow the lecture. During the lecture, we'll recommend purchasing methods and appropriately priced products.
Q. Please tell me how the lecture is conducted.
We'll be learning by following along. If you're going too fast, you'll need to pause the video intermittently to model everything to fully understand it.
Introducing the Knowledge Sharer ✒️
fromSKY
20 years of training as a device developer
Co-author of "The Complete Guide to Building Drones"
Recommended for these people
Who is this course right for?
3D CAD Beginner
Anyone who wants to learn 3D modeling and how to use it
Anyone who wants to learn how to create 2D drawings
I feel a little lost, but it was good to learn while wandering together.
I also like the drawing work that keeps the basics and
the way you teach us how to use the basics.